

Micron Aware Coffee Grind Size for Home Brewers: Fix Muddy Cups
Match your coffee grind size to your brew method: fine for espresso, medium for drip and pour-over, coarse for French press, extra coarse for cold brew. From there, one rule governs every adjustment: finer grinds pull more extraction and a bolder, sometimes bitter cup, while coarser grinds pull less and a brighter, sometimes sour one. Taste the cup, check your brew time, and nudge accordingly.
TL;DR:
- Using a burr grinder with consistent particle size is essential; blade grinders produce uneven grounds that negatively impact taste.
- Adjust grind size gradually in small increments, with fine-tuned control over 10 to 20 microns, to avoid over- or under-extraction.
- Freshly ground coffee should be stored in an airtight, opaque container away from heat and moisture to preserve flavor.
- Adjusting grind size affects extraction and taste, with finer leads to bitterness and coarser causes sourness; calibration depends on specific beans and equipment.
Table of Contents
- Coffee Grind Size Chart: Microns, Textures, and Brew Times
- Why Grind Size Controls How Coffee Tastes
- How to Dial In Your Grind for Any Brew Method
- Choosing and Maintaining a Grinder That Actually Matters
- Fixing a Bad Cup: Grind Troubleshooting Matrix
- Dialing In Rowst Single-Origin Beans
- Measuring Grind Size Without a Lab
- Keeping Ground Coffee Fresh After You Grind
- What the Research Actually Tells You to Prioritize
- Sources
Coffee Grind Size Chart: Microns, Textures, and Brew Times
Grinder dial numbers mean nothing outside their own machine. A “12” on one grinder might sit nowhere near a “12” on another, since settings aren’t standardized across brands. What does transfer between machines is the actual particle size, measured in microns (µm), and the texture it resembles when you rub it between your fingers.
Here’s how the major brew methods line up, drawing on the micron scale and grind chart data coffee professionals use to calibrate equipment:
A few things worth noticing in that spread. V60 and Chemex both fall under the pour-over umbrella, but Chemex’s thick filter paper demands a coarser grind to keep water from stalling and over-extracting. Cold brew sits at the opposite extreme from Turkish coffee: one steeps for a day at room temperature, the other flashes through a tiny cup in under a minute, and the grind size accounts for nearly all of that difference in tolerance.
A few practical notes worth keeping in mind as you read this table:
- Ranges overlap on purpose. Your palate and your gear both nudge the “right” number within a band.
- Fresher, lighter roasts often need a slightly finer grind than a dark roast to hit the same extraction, since density and bean structure differ.
- Treat every number here as a starting point, not gospel. Your specific grinder, water, and bean will move the target by a hair.
Why Grind Size Controls How Coffee Tastes
Extraction is simply the process of hot water pulling soluble compounds out of ground coffee. Smaller particles carry more exposed surface area per gram, so water dissolves their compounds faster than it does from big chunks. That’s the entire mechanism behind every grind adjustment you’ll ever make.
Grind fine, and you’re compressing hours of extraction potential into seconds (or minutes, depending on the method). Grind coarse, and you’re stretching that same potential across a longer window so it doesn’t overwhelm the cup. Espresso works because 200 to 300 micron particles surrender their flavor compounds in roughly 25 to 30 seconds. Try to push cold brew through in that time and you’d get sour, underdeveloped water. Try to steep espresso grounds for 24 hours and you’d get an ashtray.
Sour and bitter aren’t opposite ends of one dial. They’re two different failure modes, and both can happen in the same cup at once.
- Sour or thin usually means under-extraction: the water moved through before it could pull enough soluble compounds out.
- Bitter or harsh usually means over-extraction: water lingered too long, pulling out later-developing compounds that taste astringent and dry.
- Muddy and unclear, oddly enough, can mean both are happening simultaneously in different parts of the same grind.
That last point matters more than most home brewers realize. A wide particle-size distribution means your grinder is producing a mix of fine dust and coarse boulders in the same batch. The fine dust over-extracts and turns bitter while the boulders under-extract and taste sour, and you taste both flaws layered together. For scale, a human hair measures roughly 70 microns, which puts most of your espresso grind particles at three to four hair widths across. That’s a narrow enough target that a cheap grinder chewing out an uneven mix will absolutely wreck your shot before water ever hits it.
How to Dial In Your Grind for Any Brew Method
Dialing in isn’t guesswork if you follow the same loop every time: pick a starting range, weigh your dose, brew and time it, taste, adjust one variable, and repeat.
- Start in the middle of the range for your method, using the chart above.
- Weigh your coffee and water. A cheap kitchen scale removes half the variables that cause confusing results.
- Brew and time it. Note the clock, not just the finished cup.
- Taste critically. Sour and thin means grind finer. Bitter and heavy means grind coarser.
- Adjust one setting only, then brew again before touching anything else.
For espresso, target roughly 18 grams in to 36 grams out, landing in a 25 to 30 second window. A shot that runs in 15 seconds is telling you the grind is too coarse for that dose. A shot that crawls past 40 seconds is too fine, and it’s already turning bitter before it hits the cup.
For pour-over, aim for a total brew time between roughly 2.5 and 4 minutes depending on your dripper. If water pools on top of the bed and drains slowly, go coarser. If it rushes through and leaves you a thin cup, go finer.
For French press, a 4 minute steep at a coarse setting is standard. Go finer here and you’ll fight sediment and bitterness in equal measure, since the metal filter lets fine particles through.
For cold brew, coarser is almost always safer. A 12 to 24 hour steep at extra-coarse grind avoids the vegetal bitterness that fine particles produce over that much time.
Change your grinder in small increments: one or two clicks, or roughly 10 to 20 microns, then re-brew. Big jumps make it impossible to tell what actually fixed the problem.
Pro Tip: Keep a small notebook or phone note logging grind setting, dose, time, and tasting notes for every brew. Three days of logs will teach you more about your grinder than three months of guessing.
Choosing and Maintaining a Grinder That Actually Matters
Blade grinders chop coffee unevenly, no matter how careful you are with timing. Burr grinders crush beans between two abrasive surfaces set to a fixed gap, which is the only design that produces a consistent particle size you can actually dial in.
Within burr grinders, flat burrs and conical burrs behave differently. Flat burrs tend to produce tighter, more uniform particle distributions, which is why most espresso-focused grinders use them. Conical burrs often produce a wider, sometimes bimodal spread, meaning you may need to compensate with slightly different technique to avoid the sour-and-bitter-at-once problem.
Maintenance keeps that consistency intact over time:
- Brush out the chamber and chute daily to prevent stale grounds from clumping with fresh ones.
- Deep clean with grinder cleaning tablets or a full burr removal monthly.
- Replace burrs every 500 to 1,000 pounds of coffee for home machines, depending on use.
Burrs also drift as they heat up during a grinding session, and that drift, along with burr wear over months of use, is why a shot that ran perfectly yesterday suddenly runs fast today. Pros compensate by nudging the grind 10 to 20 microns finer as the grinder warms through a session. If your shots are drifting fast within a single morning, that’s thermal drift. If they’ve drifted slowly over months, it’s worn burrs, and it’s time for a replacement rather than another grind adjustment.
Pro Tip: If you’re chasing consistency and still getting muddy cups after checking dose and time, the grinder itself is usually the answer before your technique is.
Fixing a Bad Cup: Grind Troubleshooting Matrix
| Taste symptom | First change to try | Secondary check |
|---|---|---|
| Sour, thin, sharp | Grind finer | Water temp too low, dose too light |
| Bitter, harsh, dry | Grind coarser | Brew time too long, grinder needs cleaning |
| Muddy, unclear | Check for wide particle spread | Clean grinder, consider a burr upgrade |
| Weak, watery | Grind finer or increase dose | Check ratio, verify scale accuracy |
Time and temperature deserve one more look before you touch the grinder again. If espresso is landing outside the 25 to 30 second window, grind is the first suspect. If cold brew tastes bitter after less than a 12 hour steep, coarsen the grind before you shorten the steep further.
Dialing In Rowst Single-Origin Beans
Roast level and origin both shift your target grind. Lighter roasts, common across many of Rowst’s single-origin lots, are denser and often need a touch finer than a dark roast to hit the same extraction window. Every bag deserves its own dial-in session, especially in the first week or two after the roast date, when gas release is still changing how water moves through the bed.
Start in the middle of your method’s range and adjust from there. The Coffee Lover Pack gives you several origins to practice this exact process across one grinder.
Measuring Grind Size Without a Lab
You don’t need a laser diffraction machine to judge grind size at home. Your fingers are the first tool: rub a pinch between thumb and forefinger and compare it to the texture analogies in the chart above. Table salt feels distinctly different from sand, and sand feels distinctly different from kosher salt.
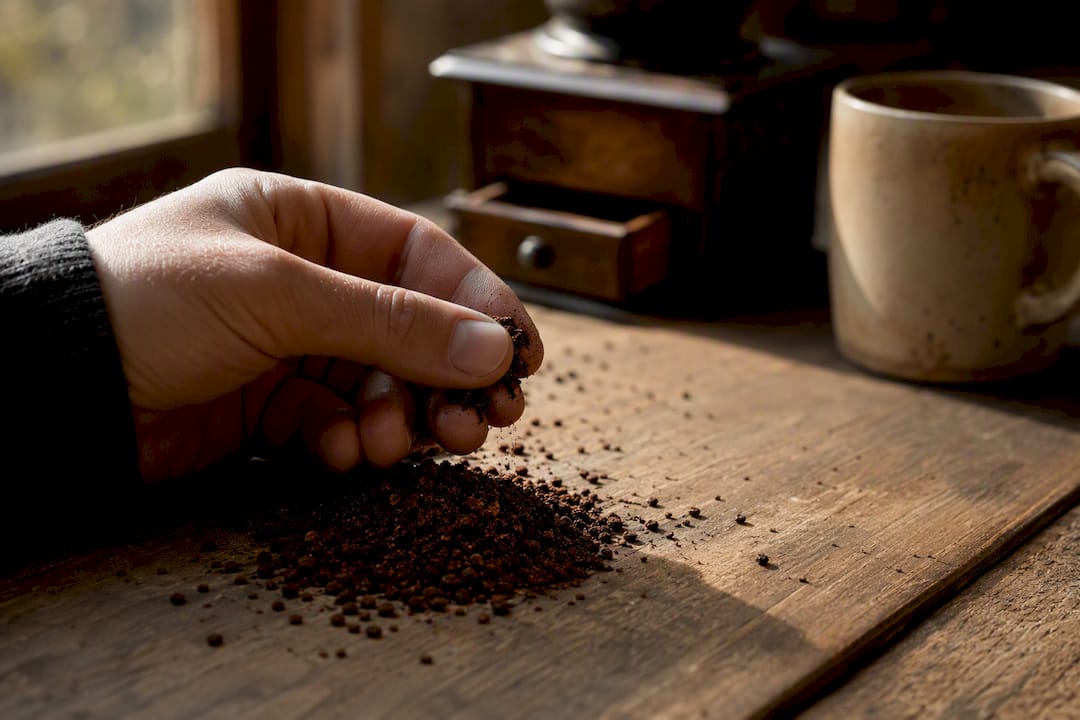
A white sheet of paper works as a simple visual check. Spread a small sample across it under good light. Uniform grinds look like a consistent field of similar-sized specks. Inconsistent grinds show visible boulders next to fine dust, a telltale sign your burrs are producing a wide distribution rather than a tight one.
Sifting is the most useful low-tech method. A set of fine kitchen sieves, or specialty coffee sieve kits sold for exactly this purpose, let you separate a sample into size bands and see roughly what percentage falls into your target range versus strays too fine or too coarse.
Timing remains your best real-world proxy. Since contact time and grind size are directly linked, a shot that pulls in the wrong window or a pour-over that drains too fast or slow is telling you about particle size even without a single micron measurement. Treat your stopwatch as a grind-size instrument, not just a brewing formality. Between finger-feel, the paper test, and consistent timing, most home brewers can catch grind problems well before they show up as a bad cup.
Keeping Ground Coffee Fresh After You Grind
Ground coffee loses freshness far faster than whole beans, since grinding exposes dramatically more surface area to oxygen. That’s the same surface-area principle driving extraction, working against you once brewing is done. Oils oxidize, aromatics escape, and the grind you dialed in perfectly on Monday can taste flat by Thursday.
Store ground coffee in an airtight container, ideally opaque or kept out of direct light, since UV exposure accelerates staling. A container with a one-way valve helps if you’re storing coffee shortly after grinding, letting residual CO2 escape without letting oxygen back in.
Keep it somewhere cool and dry, away from the stove or a sunny counter. Temperature swings encourage condensation inside the container, and moisture is one of the fastest ways to dull a grind’s flavor. Skip the refrigerator or freezer for your daily-use container, since repeated temperature cycling and ambient odors do more harm than good; a freezer only makes sense for long-term storage of beans you won’t touch for weeks.
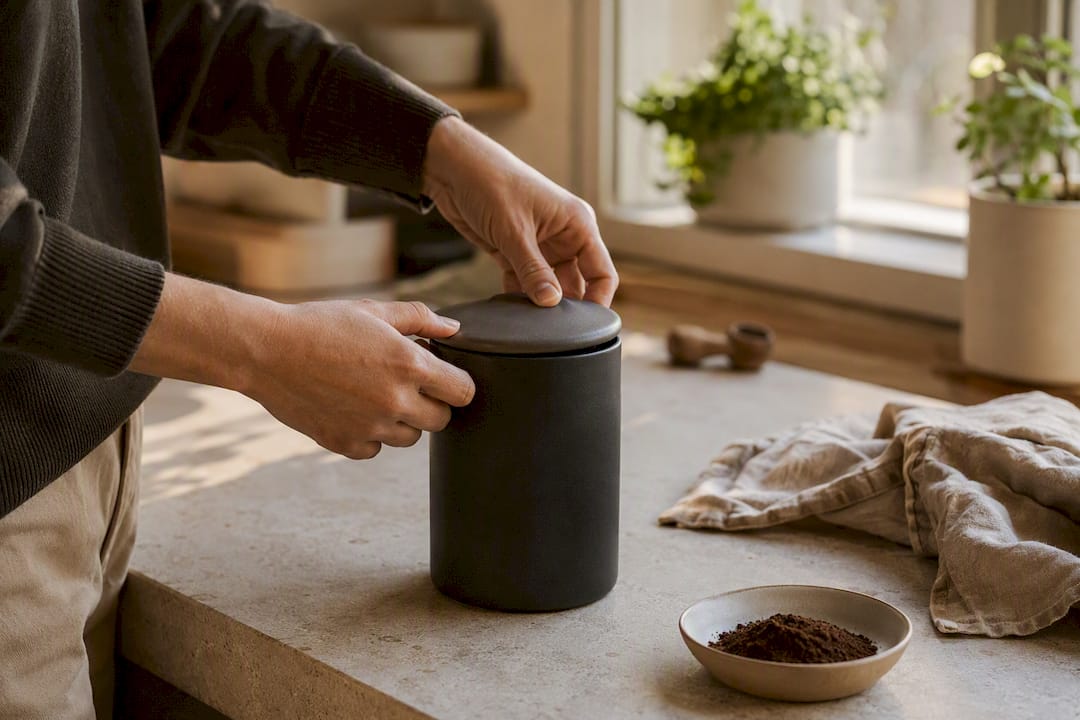
Grind only what you need for each brew when possible. A batch ground on Sunday for the whole week will taste noticeably different by Friday than the same beans ground fresh each morning, no matter how well you seal the container in between.
What the Research Actually Tells You to Prioritize
Most grind-size advice online obsesses over dial numbers, and that’s backwards. Dial numbers are meaningless outside a single grinder, since settings aren’t standardized between machines or even between two units of the same model after months of burr wear. What actually transfers is contact time, taste, and the texture analogies in a chart, and that’s the framework worth memorizing over any specific “12.5” setting you read in a forum post.
The bigger blind spot is consistency. Home brewers will spend weeks fine-tuning grind size on a blade grinder or a cheap conical burr that’s producing a wide particle spread, chasing a problem that better equipment would solve outright. A tight, uniform grind matters more than a perfectly optimized number on inconsistent equipment. If your cup tastes muddy despite careful dialing, look at the grinder itself before you look at your technique again.
Start with the ranges in this guide, taste honestly, change one thing at a time, and let your stopwatch do more talking than your dial.
— Diego
Sources
- Conversion
- Grind size chart — Not A Barista
- Microns & grind consistency — Mahlkönig
- Best grind for espresso — Breville