

Iced Pour-Over Coffee: The Flash-Brew Guide
An iced pour-over, also called Japanese iced coffee or flash-brew, is exactly what it sounds like: hot coffee brewed directly onto ice, chilling instantly to drinking strength. For a single cup right now, try this: grind 15 g of light-roast coffee medium-fine, place 100 g of fresh ice in your server, then brew 200 g of water at 200°F through a V60 directly over the ice.
Three things you need before anything else:
- A dripper (Hario V60, Chemex, or Kalita Wave)
- A digital scale
- Fresh, clean ice
Key Takeaways
Flash-brew iced pour-over is the fastest way to brew a bright, aromatic iced coffee at home, and the recipe is precise: ice counts as part of your total water volume, grind finer than you would for a hot cup, and serve immediately.
| Point | Details |
|---|---|
| Ice is part of the recipe | Use roughly one-third ice and two-thirds hot water; ice counts toward total liquid volume. |
| Grind finer than hot pour-over | Flash-chilling masks bitterness, so a slightly finer grind extracts more without harshness. |
| Bean selection matters | Light to medium roast, washed-processed single-origins showcase the most brightness when flash-chilled. |
| Use a scale every time | Weighing ice and water separately is the only reliable way to control dilution and repeat a good cup. |
| Rowst for flash-brew | The Discovery Pack and El Salvador Pacamara are curated for the clarity and brightness flash-brew rewards. |
Table of Contents
- What is iced pour-over, and why does flash-brew preserve aromatics?
- Iced pour-over vs. cold brew: which one should you make?
- What gear and ingredients do you need for iced pour-over?
- Step-by-step iced pour-over recipes: V60 and Chemex
- How do you set grind size, water temperature, and ratios?
- Common mistakes and quick fixes for iced pour-over
- Variations to try: AeroPress, Kalita Wave, and iced concentrate
- Which beans work best for iced pour-over?
- Sources
What is iced pour-over, and why does flash-brew preserve aromatics?
Flash-brew is a hot-extraction method where you brew a concentrated dose of coffee directly onto ice. The ice melts as the brew lands, diluting the concentrate to drinking strength in seconds. That near-instant chill is the whole point.
Hot coffee releases volatile aromatic compounds during extraction, and in a standard hot cup, those aromatics dissipate as the coffee cools slowly. Flash-chilling locks them in place, which is why a well-made iced pour-over tastes brighter and more fruit-forward than the same beans brewed cold overnight. The method also preserves acidity in a way that cold brew simply cannot, because cold brew never reaches the temperatures needed to fully extract those high-frequency flavor notes.
The technique traces back to Kyoto kissaten culture, where specialty cafés developed drip-over-ice methods decades before “cold brew” became a Western café staple. Kurasu and other Kyoto-based specialty cafés continue to document and refine these recipes, emphasizing clean ice and rapid chilling to protect delicate aromatics.
Iced pour-over vs. cold brew: which one should you make?
These are two genuinely different drinks, not just different temperatures of the same thing. Here is how they compare:
- Flavor: Flash-brew is bright, complex, and fruit-forward. Cold brew is smooth, low-acid, and syrupy, with a heavier body that can read as chocolatey or malty.
- Acidity: Flash-brew retains the origin’s natural acidity. Cold brew suppresses it significantly through low-temperature extraction.
- Aroma: Flash-brew captures volatile aromatics. Cold brew loses most of them during the long steep.
- Body: Cold brew tends toward a thicker, rounder mouthfeel. Flash-brew is cleaner and more tea-like, especially through a Chemex.
- Time: Flash-brew is ready in a few minutes. Cold brew requires 12–24 hours.
Flash-brew is the right choice when you want to showcase a single-origin bean’s terroir, brightness, or floral notes. Cold brew earns its place when you want a low-maintenance batch drink, something forgiving of darker roasts, or a base for milk-forward iced drinks. Caffeine content is roughly comparable between the two methods when brewed at similar ratios, but flash-brew is ready to serve immediately while cold brew requires planning ahead.
What gear and ingredients do you need for iced pour-over?
Core equipment checklist
- Digital scale: Non-negotiable for precision. Weighing ice and water separately is the only way to control dilution reliably.
- Gooseneck kettle: The narrow spout gives you control over pour speed and direction, which matters for even extraction. A spouted measuring cup can substitute in a pinch, but you lose the ability to do a controlled bloom and targeted pours.
- Dripper: Hario V60, Chemex, or Kalita Wave (more on each below).
- Burr grinder: Blade grinders produce uneven particle sizes that lead to inconsistent extraction.
- Filters: Use the filter designed for your dripper. Rinse them with hot water before brewing to remove paper taste.
- Fresh ice: Treat ice as an active ingredient. Stale freezer cubes carry off-flavors that transfer directly to the cup.
- Server or carafe: Place it under the dripper with the ice already inside before you start brewing.
- Coffee beans: Single-origin, light to medium roast. Rowst’s sourcing philosophy is built around exactly this kind of coffee.
How do V60, Chemex, and Kalita compare for flash-brew?
Dripper geometry and filter thickness shape the cup in meaningful ways. The Chemex uses a thick bonded filter that traps oils and fines, producing a clean, tea-like clarity that suits iced coffee beautifully. The Hario V60’s thinner paper allows more body and mid-tone sweetness through, rewarding precise technique with a more complex result. The Kalita Wave sits between the two, with a flat-bed design that promotes even extraction and forgives minor pour inconsistencies.
Pro Tip: If you are new to pour-over, the Kalita Wave is the most forgiving dripper for flash-brew because its flat bed distributes water evenly without requiring a perfectly centered pour. The V60 rewards precision; the Chemex rewards patience.
Step-by-step iced pour-over recipes: V60 and Chemex
Single-cup V60 recipe
This recipe follows the one-third ice split that balances dilution and extraction strength for a clean, bright result.
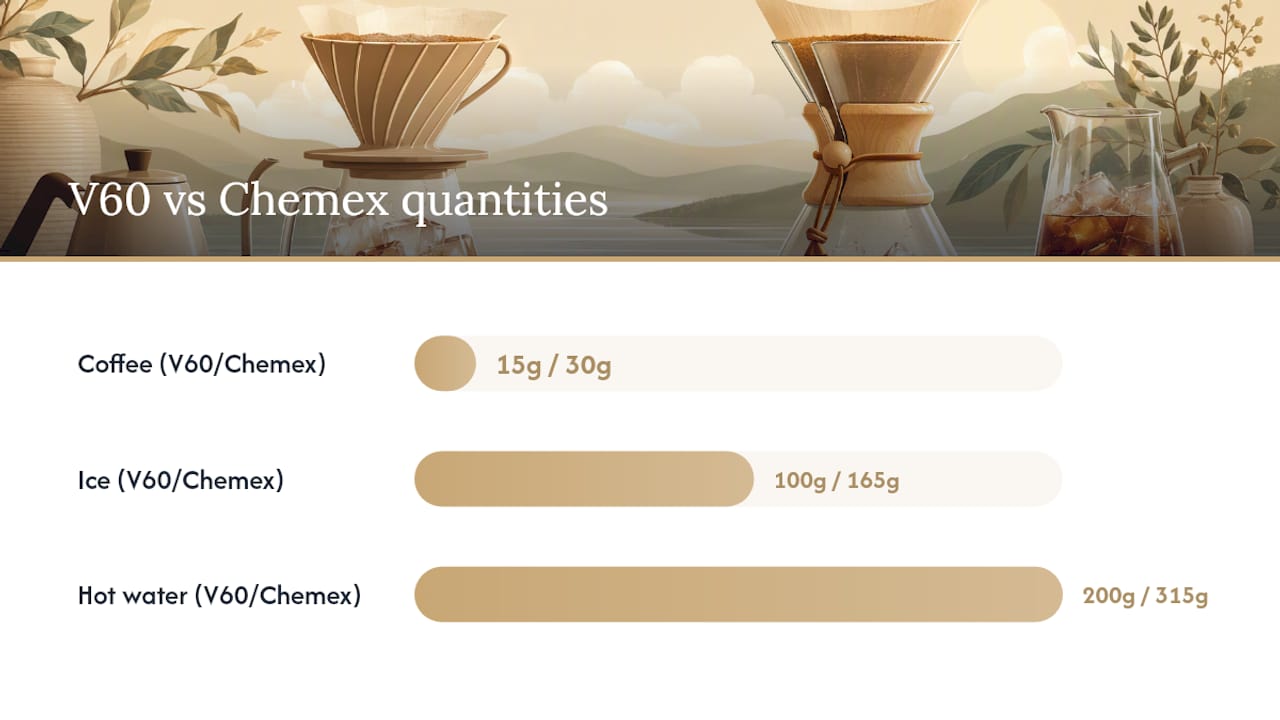
- Coffee: 15 g, medium-fine grind
- Ice: 100 g, placed in the server before brewing
- Hot water: 200 g at 200°F (93°C)
- Total liquid: 300 g (ice + hot water)
- Brew ratio: 1:20 (coffee to total liquid)
- Rinse the V60 filter with hot water and discard the rinse water. Place 100 g of fresh ice in the server beneath the dripper.
- Add 15 g of ground coffee to the filter. Tare the scale to zero.
- Bloom (0:00–0:30): Pour 30 g of water evenly over the grounds. Let it bloom for 30 seconds. The coffee will degas and swell.
- First pour (0:30–1:00): Pour to 100 g total, using a slow, circular motion. Aim for the center and spiral outward.
- Second pour (1:00–1:45): Pour to 175 g total, maintaining a steady spiral.
- Final pour (1:45–2:15): Pour to 200 g total. Let the bed draw down completely.
- Target drawdown: 3:00–3:30 total. Swirl the server gently to melt any remaining ice and integrate the brew.
Batch Chemex recipe
Serious Eats recommends placing ice in the carafe first and weighing both ice and hot water for precise dilution control. This scaled recipe serves two.
- Coffee: 30 g, medium-fine grind
- Ice: 165 g, in the Chemex before brewing
- Hot water: 315 g at 200°F (93°C)
- Total liquid: 480 g
Rinse the Chemex filter thoroughly (it is thick, so it needs more rinsing than a V60 filter). Add coffee, bloom with 60 g of water for 45 seconds, then pour in three stages to 315 g total. The Chemex draws down more slowly; expect 4–5 minutes total. Swirl the finished brew to melt remaining ice and serve immediately.
| V60 (single cup) | Chemex (two servings) | |
|---|---|---|
| Coffee | 15 g | 30 g |
| Ice | 100 g | 165 g |
| Hot water | 200 g | 315 g |
| Brew temp | 200°F (93°C) | 200°F (93°C) |
| Grind size | Medium-fine | Medium-fine |
| Bloom time | 30 sec | 45 sec |
| Total brew time | 3:00–3:30 | 4:00–5:00 |
Pro Tip: If ice remains unmelted after drawdown, swirl the server for 10–15 seconds. If the cup still tastes weak, you had too much ice. Next brew, shift 10–15 g from the ice column to the hot water column and keep the coffee dose the same.
How do you set grind size, water temperature, and ratios?
Grind size
Grind slightly finer than you would for a hot pour-over. Flash-chilling reduces the perception of bitterness, so you can push extraction a little further without harshness. Cup-Timer’s iced pour-over guide recommends a 30–40% ice split as a starting point, with grind adjustment as the primary dialing lever.
Water temperature
Target 195°F–205°F (90–96°C). A mid-point of 200°F (93°C) works well for most light to medium roasts. Darker roasts can drop to 195°F to avoid over-extraction.
Dilution math
The core rule: ice counts toward your total water volume. Pick a target final beverage mass, then split it roughly one-third ice and two-thirds hot water. For a 300 g final drink, that means 100 g ice and 200 g hot water.
Quick dialing checklist:
- Sour or thin: Grind finer, or shift a small amount from ice to hot water to increase extraction.
- Bitter or harsh: Grind coarser, or lower water temperature by 3–5°F.
- Watery: Reduce ice percentage, or increase coffee dose by 1–2 g.
- Slow drawdown: Check grind size (too fine), or ensure the filter is fully rinsed and seated.
Common mistakes and quick fixes for iced pour-over
Most problems trace back to one of three variables: grind size, ice ratio, or pour control. Here is a symptom-first guide.
- Watery, diluted cup: Too much ice relative to hot water, or coffee dose too low. Fix: reduce ice by 15–20 g and keep the hot water volume the same. If the cup is still weak, add 1–2 g of coffee next brew.
- Sour, under-extracted cup: Grind too coarse, water too cool, or bloom too short. Fix: grind one notch finer. Adjusting grind finer is usually the correct first move because flash-chilling masks bitterness, giving you room to extract more without harshness.
- Bitter, over-extracted cup: Grind too fine, water too hot, or pour too slow. Fix: grind one notch coarser or lower water temp to 195°F.
- Slow drawdown or channeling: Filter not rinsed, grind too fine, or uneven pour creating dry patches in the bed. Fix: rinse the filter thoroughly, pour in a steady spiral, and avoid pouring directly onto the filter walls.
Pro Tip: Always make one change at a time. If you adjust both grind and ice ratio simultaneously, you will not know which variable fixed the problem, and dialing in becomes guesswork.
Variations to try: AeroPress, Kalita Wave, and iced concentrate
AeroPress flash-brew
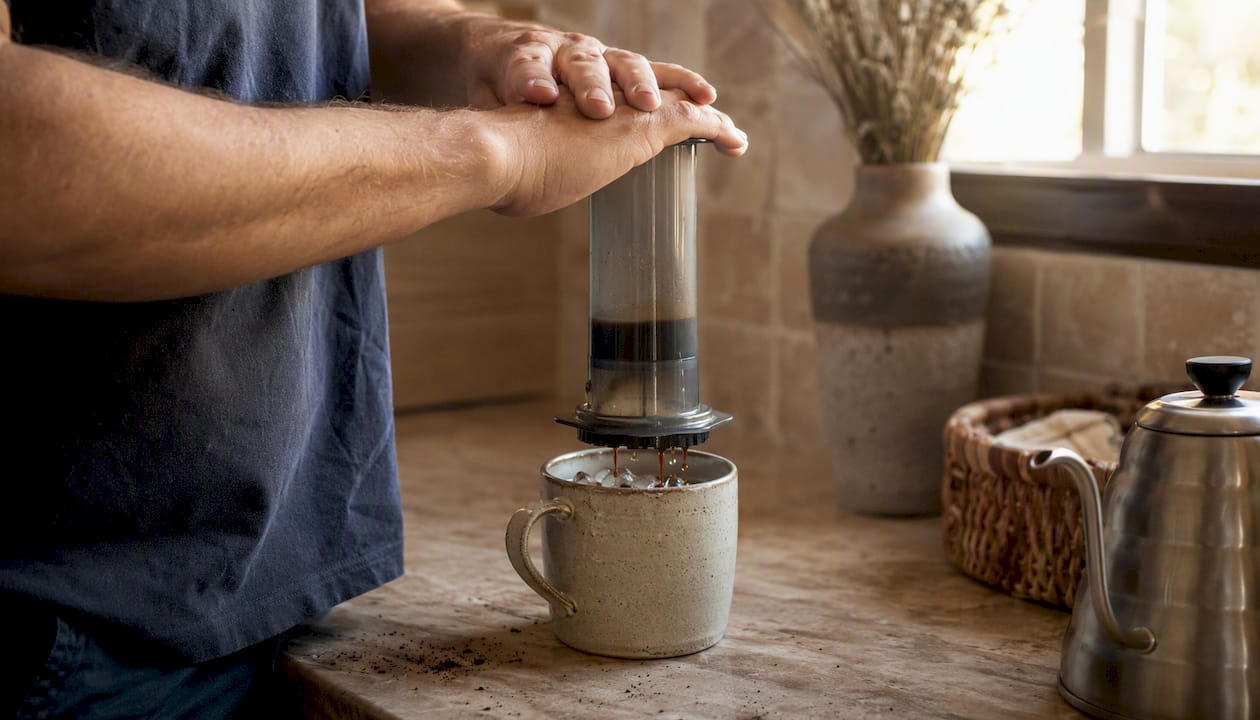
The AeroPress is an underrated flash-brew tool. Use 18 g of coffee ground medium-fine, bloom with 30 g of water for 20 seconds, then add 120 g of water and press at 1:30. Brew directly into a glass with 100 g of ice. The result is a short, punchy iced concentrate that you can dilute to taste or drink as-is for a more espresso-adjacent experience.
Kalita Wave flash-brew
Follow the same ratio as the V60 recipe (15 g coffee, 100 g ice, 200 g hot water), but pour in four smaller pulses of 50 g each after the bloom. The flat bed rewards this pulse-pour approach, producing an even extraction with a rounder sweetness than the V60.
Iced concentrate for batch serving
Bon Appétit’s flash-brew approach scales well for batch serving: 30 g coffee, 315 g hot water, 165 g ice for two large servings. Store the finished concentrate in a sealed glass jar in the refrigerator for up to 24 hours. Pour over fresh ice and dilute 1:1 with cold water when serving.
Advanced tweaks
- Pulse pouring: Four to five smaller pours instead of two or three larger ones slow the drawdown and increase extraction uniformity.
- Temperature surfing: Start at 205°F for the bloom and first pour, then drop to 195°F for the final pour to avoid over-extraction at the end of the brew.
- Citrus and spice additions: A thin strip of orange or lemon peel placed in the server before brewing adds a subtle aromatic lift that complements washed Ethiopian or Guatemalan coffees. A single cardamom pod, lightly cracked, works beautifully with a natural-processed Yemen or Ethiopian bean.
Pro Tip: If you have leftover iced brew, seal it in a glass jar and refrigerate it immediately. Drink within 12 hours. Iced coffee oxidizes faster than hot coffee because the aromatic compounds that make it bright are also the first to degrade.
Which beans work best for iced pour-over?
Roast level and processing
Light to medium roast coffees perform best in flash-brew. Perfect Daily Grind and other specialty sources consistently recommend this range because the method amplifies origin character rather than masking it. Darker roasts can work, but their roast-driven bitterness becomes more pronounced when chilled.
Washed-processed coffees tend to shine in flash-brew. The clean, transparent cup profile that washed processing produces translates directly into the cup: you taste the bean’s acidity, florals, and fruit notes without the fermented sweetness that natural processing adds. Naturals are not wrong for flash-brew, but they can read as muddy or jammy when chilled quickly.
Rowst recommendations
- Discovery Pack: The ideal starting point for flash-brew experimentation. Rowst curates this pack from single-origin coffees across different origins and processing methods, letting you taste how each responds to the flash-brew method side by side.
- El Salvador Pacamara: A standout single-origin pick for iced pour-over. The Pacamara variety is known for its complex acidity, stone-fruit notes, and clean finish — qualities that flash-chilling preserves and amplifies. Brewed over ice through a V60, it produces a cup with a clarity and brightness that is genuinely worth slowing down for.
Pro Tip: Use beans within 2–3 weeks of their roast date for flash-brew. Freshly roasted coffee releases CO₂ during the bloom, which helps agitate the grounds and promotes even extraction. Stale beans bloom weakly, and the resulting cup often tastes flat regardless of how precise your ratio is.
Quick checklist: brew a great iced pour-over in under 6 minutes
- 0:00 — Prep: Weigh ice into the server. Rinse the filter. Grind coffee medium-fine.
- 0:30 — Bloom: Pour 2x the coffee weight in water (e.g., 30 g for 15 g coffee). Wait 30 seconds.
- 1:00 — Pour: Add water in two or three steady pours, spiraling from center outward.
- 2:30 — Drawdown: Let the bed drain completely. Target 3:00–3:30 total for V60.
- 3:30 — Swirl: Gently swirl the server to melt remaining ice and integrate the brew.
- Serve immediately: Flash-brew is at its aromatic peak right after brewing.
- Dilution reminder: Ice counts as water. One-third ice, two-thirds hot water is your starting ratio.
Why flash-brew is at the heart of how we think about coffee
Flash-brew is not a shortcut. It is a method that demands the same attention to terroir and sourcing that any great cup of coffee does, and it rewards that attention more visibly than almost any other technique. When you brew a washed single-origin over ice and the cup arrives bright, floral, and precise, that clarity is a direct reflection of the bean’s origin and the care taken to grow and process it.
At Rowst, the sourcing philosophy starts with that same commitment: direct relationships with small-scale producers, no intermediaries, and a focus on coffees that have something specific to say. Flash-brew is one of the clearest ways to hear it.
Brew the recipes in this guide, adjust as you go, and return to the variations section when you are ready to push further.
Rowst beans worth trying for your first flash-brew
The single sharpest advantage of starting with Rowst beans for flash-brew is specificity: every coffee comes with a clear origin story, a known processing method, and a roast profile calibrated for exactly the kind of brightness this method rewards.

The Discovery Pack is the most practical entry point. It gives you several single-origin coffees to brew side by side, so you can taste how origin and processing interact with the flash-brew method before committing to a larger bag. For readers who already know they want a single-origin pick with exceptional clarity and stone-fruit character, the El Salvador Pacamara is the one to start with. Both are available directly at Rowst, with whole bean and ground options at checkout.
Sources
- Japanese Iced Coffee Recipe: Flash-Brewed Over Ice (The Fastest Iced Coffee Method) | Barista At Home
- Iced pour-over guide — Cup-Timer
- How to Make Iced Pour-Over Coffee | Serious Eats
- Make ice brew, not cold brew | Bon Appétit
- Chemex vs V60: Which Pour Over Brewer Is Better? (2026 Comparison) – Brewed Barista
- How To Make Japanese Iced Coffee - Perfect Daily Grind